Snap, Flaunt, Repeat: Unleashing Your Nail Art Photography Skills
In the vibrant world of nail artistry, snapping perfect photos of your creative work isn’t just a bonus—it’s essential. As the digital age continues to thrive, showcasing your nail art prowess online becomes a game-changer, offering you a canvas larger than any salon wall. But fear not, because capturing stunning images to elevate your nail tech career doesn’t require a hefty investment. Whether you’re an up-and-coming guru or an experienced artist, the right photography skills can amp up your portfolio without emptying your wallet. Get ready to dive into tangible tips and creative techniques that promise to make your nail art the talk of every feed.
The Power of Your Smartphone: Your Compact Photo Studio
Forget about lugging around a massive DSLR. Your friendly neighborhood smartphone has evolved into a mini-studio, ready to capture your nail art in high-definition wonder. Today’s smartphones come packing impressive cameras that will do justice to even the minutest rhinestone or the finest line of a freehand design. For aspiring nail techs on a budget, leveraging your smartphone for photography is not just savvy—it’s genius!
To unleash the full potential of your device, start by cleaning your camera lens. You’d be surprised how a simple wipe can enhance clarity. Adjust your camera’s focus manually when capturing close-up shots to ensure every detail pops. Also, explore your phone’s camera settings: use HDR to capture a greater range of color depth or play with portrait mode for that buttery background blur. So, while you’re busy painting masterpieces, let your phone be the dutiful documentarian it was born to be. Remember, your creative toolbox is only as valuable as the phone you’re wielding, so make the most out of it!
Lighting: Your Art’s Best Friend
Hand in hand with your phone comes lighting—meet your new best friend. You’ve got the art; let lighting do the stage direction. Proper lighting is the make-or-break factor between a drab shot and a vibrant showcase. Natural light is pure and often the most flattering for capturing authentic colors. So, if you can, position your clients’ hands near a window and let that glorious daylight work its magic.
On days when natural lighting is playing hard to get, or if you’re working hours don’t align with sunlight, there’s always a solution. LED ring lights are your go-to—they’re budget-friendly and perfect for ensuring your nail work remains in perfect spotlight. Alternatively, a DIY lightbox using white fabric and a few inexpensive lamps can transform your workspace into a studio. The trick is to avoid harsh shadows and allow each shade of polish to glow as you’ve intended.
Composition Hacks: Framing That Speaks Volumes
The secret ingredient to eye-catching nail photos? A little thing called composition. Imagine you’re a director framing the scenes of your latest blockbuster (which happens to star your nail art). The rule of thirds is the Oscar-winning star here; position your subject (that’s your fabulous nails) off-center for visually dynamic shots.
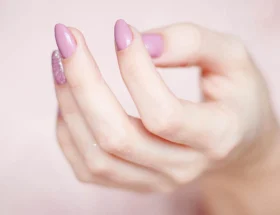
Don’t underestimate the power of hand placement and props. Hands relaxed in an elegant pose or gently cradling a flower can speak volumes and add storylines to your shots. Consider backgrounds too—simple, solid colors work wonders in letting the nails do all the talking, while themed props can provide a charming narrative.
Editing Magic: Apps That Transform Your Photos
Now that you’ve snapped the perfect shot, it’s time for a bit of digital artistry. Enter the realm of editing apps that can take your photos from lovely to legendary. Consider an app like Snapseed or VSCO, which offers robust editing tools right from your phone. A touch of brightness, adjusting contrast, or enhancing saturation can bring the nuances of your artistry to life without sacrificing authenticity.
Keep those edits light though; your art should glow, not morph into something it isn’t. A gentle sharpen here or a slight vignette there can accentuate your work while maintaining its true essence. Use apps to crop your photos to highlight the nails, eliminating distractions. With a touch of color correction, your photos will pop on social media, drawing the eyes of onlookers and potential clients alike—like moths to a flame.
Sharing Your Masterpieces: Social Media Strategies on a Shoestring Budget
Time to unleash your artistry upon the world! Social media isn’t just a platform; it’s your gallery. To maximize visibility, selection is key: find the platform where your audience flutters lively (Instagram is a nail champ for a reason). Captions are your hype piece, so let your vibrant personality shine through with engaging, quirky commentary or insights into your creative process.
Planning content might sound daunting, but apps like Planoly or Later can help you maintain an active and cohesive feed with scheduled posts. Use hashtags like a wizard casting spells—specific, relevant, and trending. Best of all, these strategies require more ingenuity than expenditure, keeping you financially savvy while building an impressive portfolio.
A Final Swipe: From Aspiring to Inspiring
In your journey from a budding nail artist to an inspiring figure in the beauty community, experimentation is your creative palette. Develop your own style, play with angles, punch up colors—let every photo reflect not just the art on your nails, but the artist behind them. By embracing these budget-friendly tips, you’re doing more than saving a few bucks; you’re laying the foundation for a stellar visual portfolio that could launch your career into the stratosphere.
Every snap you take, every photo you share, adds a brushstroke to your evolving masterpiece in the world of nails. So go on, inspire, and let your art speak volumes, one flashy nail photo at a time.
